Discription:The key to this recipe, which has its origins in the hill station of Tamil Nadu, is coconut, mint and coriander leaves which lends a greenish brown shade and infuses the korma with a mild sweet herby flavor, filling the kitchen with an aroma that is almost intoxicating. The use of aniseed (saunf) and cardamom add even more fragrance and flavor to the unassuming korma.
Ingredients:


Ingredients:
- 1 kg chicken pieces, washed
- 2 large onions, finely chopped
- 1 1/2 tbsps ginger garlic paste
- 1 large tomato, chopped
- 1 tsp red chilli pwd
- 1/4 tsp turmeric pwd
- 1 1/2 tbsp lemon juice
- salt to taste
- 2-3 tbsps oil
- chopped coriander leaves for garnish
- 1 tsp cumin seeds
- 1 tsp saunf
- 1 tsp khus khus
- 1″ cinnamon
- 2 cardamoms
- 5 tbsp grated fresh coconut
- 8 cashew nuts
- 1 tbsp roasted chickpeas
- 6-8 curry leaves
- 8-10 shallots/sambar onions
- 4 green chillis
- 3 tbsps chopped coriander leaves
- 15 mint leaves
- Make a paste of ingredients under ‘dry roast’ and ‘roast’ by adding a few tbsps of water and keep aside.
- Heat oil in a heavy bottomed vessel, add curry leaves and saute for few secs.
- Add the chopped onions and fry till transparent.
- Add ginger-garlic paste and saute for 3 mts. Add red chilli pwd, turmeric pwd and salt and combine.
- Add the chopped tomatoes and fry for 4-5 mts.
- Add the ground paste and cook over medium heat for 7-8 mts.
- Add lemon juice and the chicken pieces and combine.
- Cook without lid for 5-6 mts. Add 3 cups of water and cook with lid on simmer till the chicken is tender and the gravy thickens.
- Garnish with chopped coriander leaves. Turn off heat.
- Serve with pulao, biryani, coconut rice or rotis.


Discription:Despite all of the mesmerizing flavors of egg masala, the key factor that really put it over the edge was the ground paste made from ordinary ingredients like poppy seeds, coconut and curry leaves! Addictive taste, warming and satisfying! Serve with rotis, rice or pulao.
Ingredients:


Ingredients:
- 3-4 boiled eggs
- 2 cloves,
- 1/2″ cinnamon
- 1 elaichi
- 1/4 star anise
- pinch of mustard seeds
- 1 large onions, chopped
- 1/2 tsp ginger garlic paste
- 1 large tomato, blanched, peeled and pureed
- 1 tsp coriander pwd
- 1 tsp red chilli pwd
- pinch of garam masala pwd
- salt to taste
- 2 tbsps oil
- coriander leaves for garnish
- little less than 1/4 tsp cumin seeds, lightly roast for 2 mts
- 2 tbsps fresh coconut
- 3/4 tsp khus khus, soak in a tbsp of water for 15 mts
- 2-3 cashew nuts
- 4-5 curry leaves
- 1 green chilli
- Heat 2 tsps oil in a heavy bottomed vessel, add the boiled eggs and saute of low to medium flame for 2-3 mts. Add a pinch of turmeric pwd and combine.
- Remove and keep aside.
- In the same pan, add the remaining oil and add the cloves, cinnamon, elaichi and star anise and mustard seeds and saute for a few secs till the mustard splutters.
- Add chopped onions and saute till onions turn transparent.
- Add ginger garlic paste and saute for 4 mts.
- Add chilli pwd, coriander pwd and salt and combine.
- Add the tomato puree and cook for 3-4 mts.
- Add the ground paste and cook for 8-10 mts.
- Add 1/4 to 1/2 cup of water and bring to boil.
- Add the boiled eggs and let it cook in this masala for 7-8 mts on medium flame.
- Reduce flame and cook till you get the desired curry consistency.
- Add garam masala pwd and combine.
- Garnish with coriander leaves.
- Turn off heat and serve hot with rotis or white rice.


Discirption:Spicy red whole chicken,marinated in yogurt and spices traditionally cooked in a clay oven called “tandoor”.In this recipe we just bake the chicken in the oven and brown it under a broiler.Works pretty well.
Ingredients:
- 1 whole chicken without skin ( 1 ¼ kg or abt 3 lbs)
- 1 ½ tsps chili powder
- 1 tsp coriander powder
- 1 /4 tsp turmeric powder
- 1 tsp garam masala
- 2 tsps ginger garlic paste
- 2 Tbsps lemon juice
- 3 Tbsps plain yogurt/curd
- 3 Tbsps oil
- Red food coloring as needed
- Salt to taste
- Wash the chicken and make slits with a sharp knife.
- Pat dry.
- To the curd add the rest of the ingredients and mix well.
- Pour spice mixture over the chicken and let it marinate for about 6 hrs in the refrigerator.
- Preheat oven to 400 F.
- Line the oven proof dish with foil if preferred.
- Baste the chicken with oil and bake for 30-45 mins or until chicken is cooked through.(depending on the oven)
- Baste with dripping halfway through the cook time.
- When done, broil the chicken on high for a min till browned on top.
- Serve garnished with lemon wedges and onions.


Discription:This is tasty chicken gravy.Try it and Enjoy!!!
Ingredients:


Ingredients:
- 1 lb chicken
- 1 large onion chopped
- 1 tomato chopped
- 3 tbsps chopped coriander leaves
- 3 tbsps chopped mint leaves
- 1 tsp ginger garlic paste
- 1 tsp coriander powder
- 1 /2 tsp chili powder
- 1 /4 tsp turmeric
- 3 cardamoms
- 2 cloves
- 3 pieces cinnamon
- 1 cup coconut milk
- 1 cup water
- 2 tbsps oil
- salt to taste
- Heat oil.
- Add the chopped onions,whole spices,mint & coriander leaves and salt and cook till translucent.
- Add the ginger garlic paste and fry till lightly browned.
- Add the tomatoes ,chili,coriander and turmeric powders.Mix well and cook till tomatoes are soft.
- Add the chicken pieces and 1 cup of water.Bring to a boil.Reduce heat ,cover and let it simmer till the chicken is well cooked.
- Remove lid, add the coconut milk and simmer for about 3 mins.
- Serve with rice or chappathis.


Discription:Pepper Chicken (Murg Kali Mirch) is one of the most popular and tasty recipes from the world of Chettinad cuisine. This is one of the fairly simple recipes to cook requiring few ingredients and yet it is so very delicious.
Ingredients:


Ingredients:
- Chicken - 1k.g/2.2lb
- Garlic cloves - 10-15
- Onions, chopped - 1/2 (medium sized)
- Green Chili - 4
- Curry leaves - 25 individual leaves
- Soya Sauce - 1 1/2 tablespoon (for dark Soya Sauce) or 2 tablespoon (for light colored Soya Sauce)
- Pepper Powder - 1 or 1 1/2 tablespoon
- Lime or Lemon juice - 1 teaspoon
- Ghee - 1 teaspoon
- Oil - 1 teaspoon
- Turmetic powder - 1/4 teaspoon
- Salt to taste
- Coriander or Cilantro for garnish
- Heat oil and ghee under medium heat in a deep frying pan or khadhai.
- Add crushed garlic cloves. Saute and stir for 2 minutes
- Add onion, green chillies (vertically sliced) and curry leaves to the mixture. Stir the ingredients for 2 more minutes
- Then add chicken and mix the contents of the pan.
- Now lower the heat and cover the pan with a lid. Allow the chicken to cook for 10-15 minutes.
- Add tumeric, salt to taste and mix it thoroughly
- Put the lid back over the pan and cook for 5 more minutes
- Add soya sauce and wait for 2 additional minutes
- At this moment all the liquid in the pan should have evaporated which indicates that the chicken is fully cooked.
- When there is no liquid left in the pan add pepper powder, lemon juice and mix well.
- Garnish with coriander leaves and serve hot.
- Please follow the method for preparing this recipe exactly in the same sequence as mentioned above for great tasting pepper chicken. Happy cooking!


Discription:Its gravy can be made as hot or mild as you like so it suits most palates. According to a documentary by the Discovery Channel, the butter chicken recipe was invented by a person working in the kitchen staff of a famous restaurant called Moti Mahal located in Daryaganj, the central region of Delhi.
Ingredients:


Ingredients:
- Chicken: 1 kg or 2.2 lb
- Onion paste: 1 cup
- Tomato puree: 2 cups
- Ginger Garlic paste: 2 tbsp
- Green Chili: 2 nos
- Meat Masala powder: 2 tbsp
- Red Chili powder: 1 tbsp
- Food Color: 1/4 tsp
- Garam Masala: 1 1/2 tbsp
- Dhania powder: 1 1/2 tbsp
- Kasoori Methi: 2 tbsp
- Butter: 100 gms
- Coconut paste (Optional) : 1/2 cup (Add more if you need more gravy)
- Turmeric Powder: 1/4 tsp
- Cinnamon (Dalchini), Cloves (Lavang) and Cardamom (Elaichi) powder: Make 1/4 tsp of powder with 2 sticks of cinnamon, 4 cloves and 2 cardamom
- Salt to taste
- Coriander for garnish
- In a bowl add chicken, 1/2 cup onion paste, 1 tbsp ginger garlic paste, 1 tsp salt, food color and mix well. Keep aside for 1 hour.
- In a pan on medium heat add butter.
- When the butter melts add the remaining onion paste and saute for around 5 minutes till the raw smell of onion no longer exists.
- Add the green chili cut into long slices and ginger garlic paste to the mix and stir for 3 minutes.
- Add tomato puree and cook for another 6 minutes Then add 1/4 cup water.
- Add dhani powder, meat masala powder, garam masala powder, turmeric powder, chili powder and mix well.
- Now add the marinated chicken and cook for 15 minutes with a lid covering the pan on low heat.
- At this stage add cinnamon, cloves and cardamom powder, kasoori methi and coconut paste.
- If you want more gravy you can add more water and salt.
- Cook for another 10 minutes or so until the chicken is well cooked.
- Garnish with coriander and serve hot.
- This delicious Butter Chicken goes very well with all types of Rotis and flavored rice like Ghee Rice and Jeera Rice.


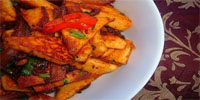
Discription:This is tasty manchurian recipe.Try it and Enjoy!!!!!!!
Ingredients:


Ingredients:
- 1 med. cauliflower
- 1 med. onion (Chopped)
- 2 cloves of garlic (Finely chopped)
- 1"piece ginger (Finely chopped)
- 4 green chillies (finely chopped)
- Cilantro for garnishing
- 6 tbsp tomato ketchup
- 1 tsp soy sauce
- 1 tbsp corn starch
- salt to taste
- 2 tsp vinegar
- 1 cup All purpose flour
- 1/2 cup corn starch
- 1/2 tsp crushed pepper
- 1/2 tsp red chilli powder
- Oil for deep frying
- 2 tbsp oil
- Cut cauliflower in to medium sized florets. Wash and drain on a kitchen towel.
- Mix cornflour, all purpose flour, salt, pepper powder and red chilli powder along with little water to make it a thick paste.
- Heat oil in a pan. Dip cauliflower florets into this paste and deep fry them until golden brown and set them aside.
- Mix 1 tbsp corn starch in half a cup of water and mix it without lumps.
- Heat 2 tbsp oil in a wok. Add chopped onions and fry till translucent.
- Add chopped ginger, garlic and green chilli and saute for a few seconds.
- Now add soy sauce, vinegar and diluted corn starch, tomato ketchup and little bit of salt. Mix it well.
- Now add the fried cauliflower florets and stir fry on a high heat till all the water evaporates.
- Serve hot garnished with cut coriander leaves.


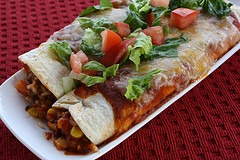
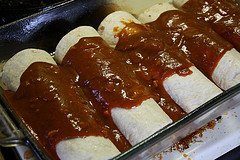
Discription:This is a great recipe for anyone looking to make their own homemade enchilada sauce. This is specifically the red enchilada sauce.This sauce beats anything you will find in the store, is easy to make and is extremely delicious. This goes perfect with any type of enchiladas… beef, chicken, pork, shrimp, ect. If you are looking for a solid enchilada sauce recipe, be sure to try this one. Enjoy.
Ingredients:
Step 1: In a large saucepan over medium heat, heat oil. Add garlic and stir fry for 30 seconds. Add onion, oregano, basil, chili powder, ground black pepper, salt, cumin, parsley, salsa, and tomato sauce. Mix well. Stir in the water.
Step 2: Bring to a boil, reduce heat to low and simmer for 15 to 20 minutes.
Step 3: Pour over pre-made enchiladas for baking.


Ingredients:
- 1 tablespoon olive oil
- 2 garlic cloves (minced)
- 1 teaspoon onion (minced)
- ½ teaspoon oregano
- 2 ½ teaspoons chili powder
- ½ teaspoon dried basil
- 1/8 teaspoon ground black pepper
- 1/8 teaspoon salt
- ¼ teaspoon ground cumin
- 1 teaspoon dried parsley
- ¼ cup salsa
- 1 (6 ounce) can tomato sauce
- 1 ½ cups water
Step 1: In a large saucepan over medium heat, heat oil. Add garlic and stir fry for 30 seconds. Add onion, oregano, basil, chili powder, ground black pepper, salt, cumin, parsley, salsa, and tomato sauce. Mix well. Stir in the water.
Step 2: Bring to a boil, reduce heat to low and simmer for 15 to 20 minutes.
Step 3: Pour over pre-made enchiladas for baking.


Discription:Unless you’re a vegetarian you probably love to eat bacon. With good reason it has become one of the most popular foods on the planet. After all, what would breakfast be like without some delicious, crispy bacon? That brings us to a commonly asked question, how do I cook crispy bacon? Because of its thin cut and high fat content, making your bacon perfectly crispy can be a little bit tricky at times.
One thing you may be wondering before we get started, which of these methods would I consider the best? Well, let’s see… the frying pan is by far the hardest and it’s extremely messy. The microwave is by far the easiest but at times the bacon will stick horribly to the paper towel. That leaves us with the oven, the o-so glorious oven. The oven brings the total package by giving the bacon both great flavor and texture. With all that being said, if you want to impress someone with your cooking skills, use the fry pan. If you’re in a hurry, use the microwave but if you want the best results go with the oven! Alright then, let’s begin.
Method 1: Cooking Bacon in a Frying Pan
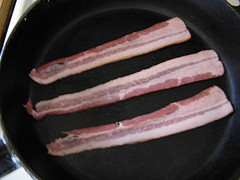
Step 1: Add 3-4 slices of bacon to a cold large frying pan and turn the heat to medium-low. What you want to do here is cook as much fat off the bacon as you can without it burning. In other words you want to use high enough heat that it cooks the bacon, but low enough that it doesn’t burn.
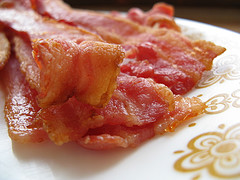
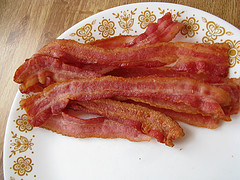
Step 2: As your bacon is cooking constantly turn it over so that it cooks evenly on both sides. If too much fat collects in the pan you’re going to want to drain it. During this process there shouldn’t be any black on the edges of the bacon at all. If there is that means it’s burning and you need to turn down the heat. Depending on how thick your slices are or how many are in the pan, your bacon should be done in about 10-15 minutes. You will know it’s done when it turns a deep brown color. When finished drain on paper towels. The bacon should not be fully crisp while it’s still in the pan. It will crisp after the paper towels soak up the fat.
Method 2: Cooking Bacon in the Microwave
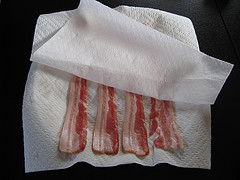
Step 1: Place 2 plain white paper towels on a plate, and place 3-4 strips of bacon on top without overlapping them. Now place a paper towel on top of the bacon or else it will splatter all over your microwave! Just gently place the paper towel over the bacon without pressing down on it. If you do the bacon will stick to it badly while it cooks.
Step 2: Put your bacon into the microwave and microwave on high for 3 minutes. Check and see if your bacon is done. If it isn’t, microwave for an additional 30 seconds or until it’s crispy.
Method 3: Cooking Bacon in the Oven
Step 1: With your oven rack in the middle position, pre-heat the oven to 375 degrees.
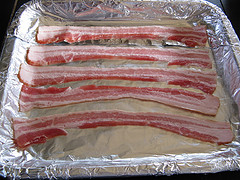
Step 2: Line your baking pan with aluminum foil. The one I use is about 1 ½ inches deep but you could use one that is about ¾ of an inch deep. Now separate your slices of bacon and place them side by side on the baking sheet.
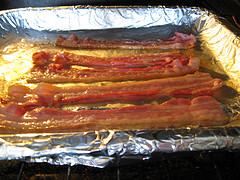
Step 3: Place your baking pan into the oven. During the cooking process if fat becomes excessive you should take your pan out of the oven and drain it off.
Step 4: The bacon should be crisp into about 15-20 minutes. Remove from the oven and transfer bacon onto paper towels to soak up the fat.


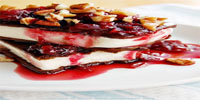
Discription:It’s extremely easy to make, and the almond extract and macadamia nut crust give it a delicious and unique flavor. It goes great topped with cherry or blueberry pie filling, but you could use any fruit filling or none at all.Try it and Enjoy!!
Ingredients:
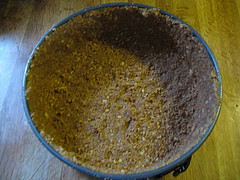
Step 2: Press onto the bottom and sides of a 9 inch springform pan.
Step 3: Place it into the oven and bake for 7 minutes, then remove and let it cool.
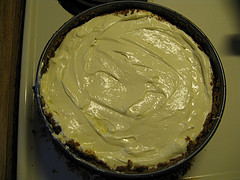
Step 4: Increase oven temperature to 475 degrees. Combine cream cheese, 1 ¾ cup sugar, 3 tablespoons of flour, 5 eggs and 2 egg yolks, and mix thoroughly. Next, add almond extract and heavy whipping cream and mix just enough to blend.
Step 5: Pour filling mixture over your crust. Place back in the oven and bake on 475 for 10 minutes.
Step 6: Reduce oven temperature to 200 degrees and let your cheesecake bake for 1 hour. After an hour turn off your oven, but leave the cake in there for another hour before taking out.
Step 7: Remove the cheesecake from your oven, cool slightly and then place it overnight in your refrigerator.


Ingredients:
- 1 ¾ cup graham cracker crumbs (crushed)
- ¼ cup macadamia nuts (crushed)
- 1 teaspoon ground cinnamon ½ cup butter
- 5 (8 oz) Packages of softened cream cheese
- 1 ¾ cup sugar
- 3 tablespoons of flour
- 5 eggs
- 2 egg yolks
- ¼ heavy whipping cream
- 1 ½ teaspoons almond extract
Step 2: Press onto the bottom and sides of a 9 inch springform pan.
Step 3: Place it into the oven and bake for 7 minutes, then remove and let it cool.
Step 4: Increase oven temperature to 475 degrees. Combine cream cheese, 1 ¾ cup sugar, 3 tablespoons of flour, 5 eggs and 2 egg yolks, and mix thoroughly. Next, add almond extract and heavy whipping cream and mix just enough to blend.
Step 5: Pour filling mixture over your crust. Place back in the oven and bake on 475 for 10 minutes.
Step 6: Reduce oven temperature to 200 degrees and let your cheesecake bake for 1 hour. After an hour turn off your oven, but leave the cake in there for another hour before taking out.
Step 7: Remove the cheesecake from your oven, cool slightly and then place it overnight in your refrigerator.


